In this post we will see on how to start and stop Azure Analysis Services using Azure DevOps release pipelines to save cost. There is a great blog about how to do it in automation account here, however this can also be achieved via Azure DevOps pipeline and to avoid quite a bit of configuration in automation account to get it working as expected. So, let’s use the script given in the blog and set up the pipelines.
Table Of Contents
- Tweak PowerShell Script
- Setup Release Pipelines
- Conclusion
Tweak PowerShell Script
Let’s create a function Set-AASStatus which takes arguments for parameters $AasAction, $ResourceGroupName and $AnalysisServerName.
function Set-AASStatus {

    [CmdletBinding()]
    param(
        [Parameter(Mandatory=$True,Position=0)]
        [ValidateSet('Start','Stop')]
        [string]$AasAction,

        [Parameter(Mandatory=$True,Position=1)]
        [ValidateLength(1,100)]
        [string]$ResourceGroupName,

        [Parameter(Mandatory=$True,Position=2)]
        [ValidateLength(1,100)]
        [string]$AnalysisServerName
    )

    begin {
        # initialize function variables
        $Message = "Begin function"
        Write-Verbose $Message
    }

    process {
        try {
            $aas = Get-AzAnalysisServicesServer -ResourceGroupName $ResourceGroupName -Name $AnalysisServerName

            if (-not $aas)
            {
                Write-Error "$AnalysisServerName not found in $ResourceGroupName"
                exit 0
            }
            else
            {
                $state = $aas.State
                Write-Verbose "Current status of $AnalysisServerName - $state"

                if (($AasAction -eq "Start" -and $aas.State -eq "Succeeded") -Or ($AasAction -eq "Stop" -and $aas.State -eq "Paused"))
                {
                    $state = $aas.State
                    Write-Error "Cannot $AasAction $AnalysisServerName while the status is $state"
                }
                # Resume Azure Analysis Services
                elseif ($AasAction -eq "Start")
                {
                    Write-Verbose "Now starting $AnalysisServerName"
                    $null = Resume-AzAnalysisServicesServer -ResourceGroupName $ResourceGroupName -Name $AnalysisServerName
                }
                # Pause Azure Analysis Services
                else
                {
                    Write-Verbose "Now stopping $AnalysisServerName"
                    $null = Suspend-AzAnalysisServicesServer -ResourceGroupName $ResourceGroupName -Name $AnalysisServerName
                }
            }
        }
        catch {
            throw $_
        }
    }

    end {
        $Message = "End Function"
        Write-Verbose $Message
    }
}

# We need this to create a task group in Azure DevOps and add in the release pipeline's task
Set-AASStatus -AasAction $(AasAction) -ResourceGroupName $(ResourceGroupName) -AnalysisServerName $(AnalysisServerName) -Verbose
Now that we have the script with minor tweaks and wrapped inside a function. Let’s create a task group in release pipeline for this script, so that we can call it whenever required.
Setup Release Pipelines
Let’s setup the release pipelines to start and stop the AAS.
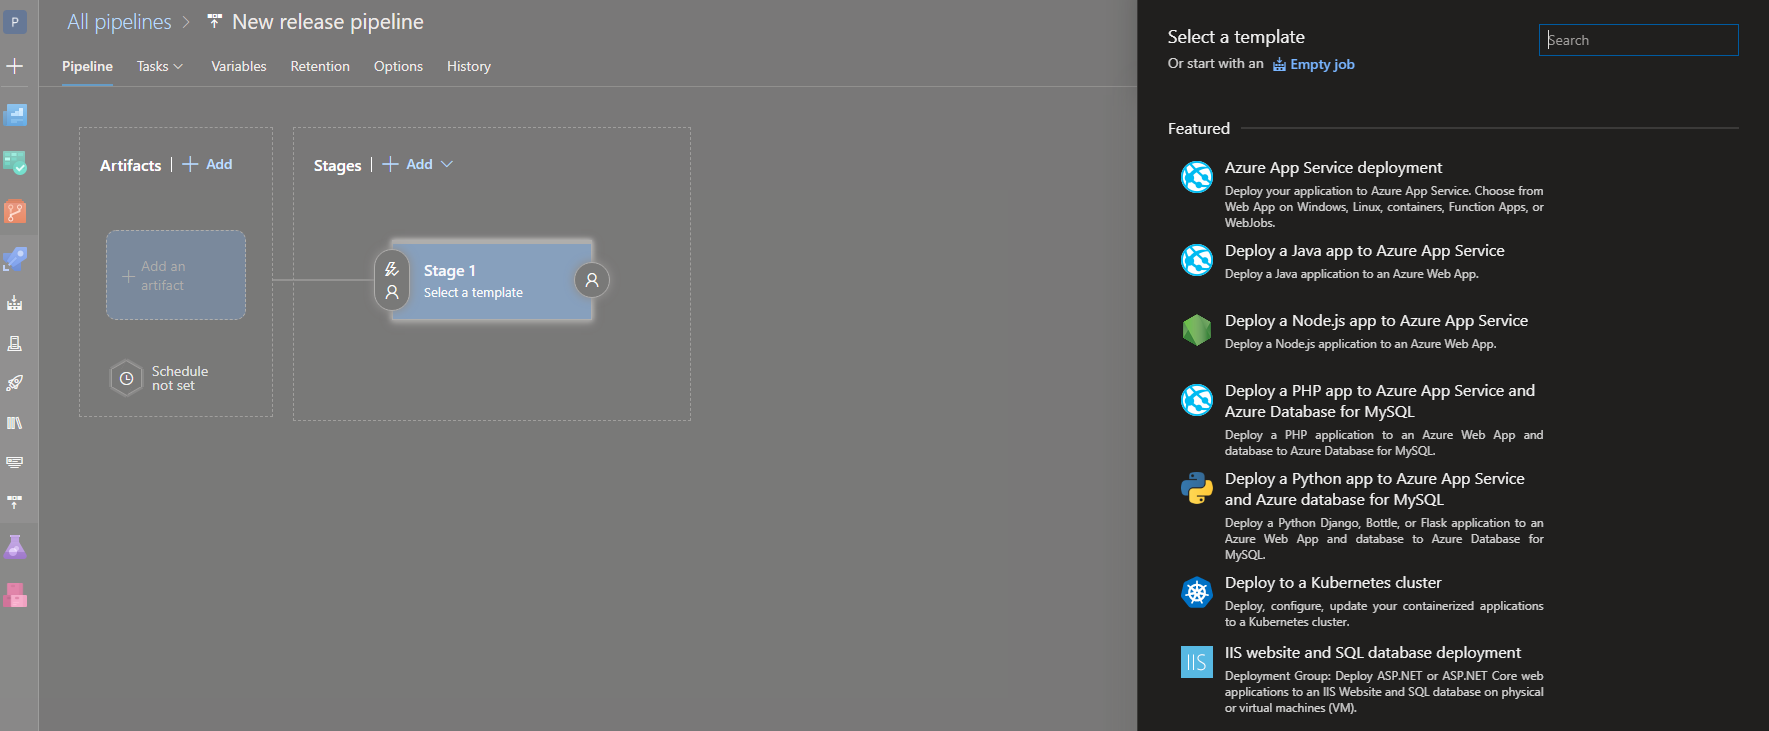
- Navigate to Azure DevOps and select Releases from Pipelines tab. Click on New and select New Release Pipeline, you will see a window similar as shown below.
Let’s start with the empty job and for this task we are going to use classic editor.
- Click on
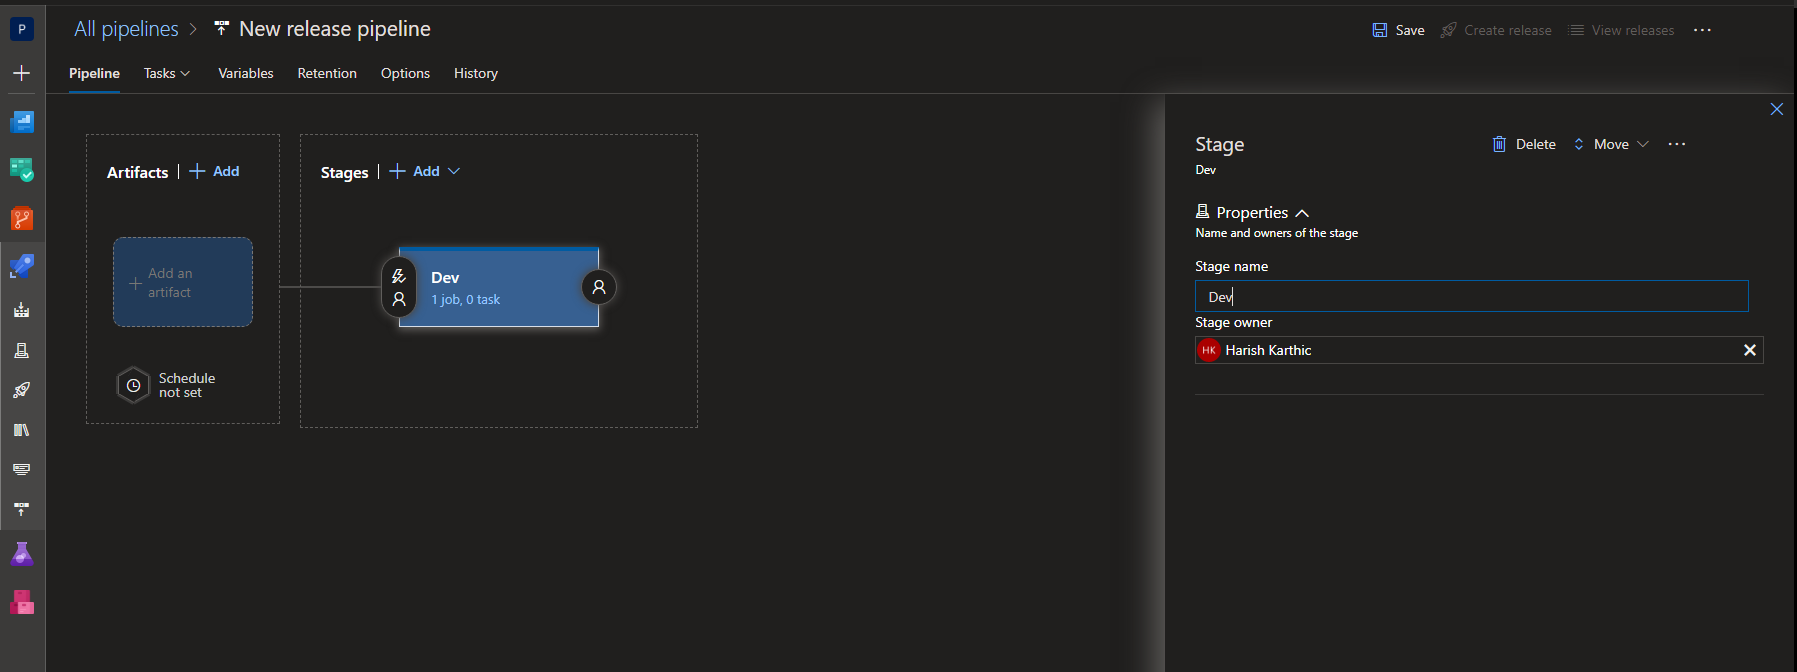
Empty Joband name the environment in which you need to implement the action. For this post let’s name the stage as Dev.
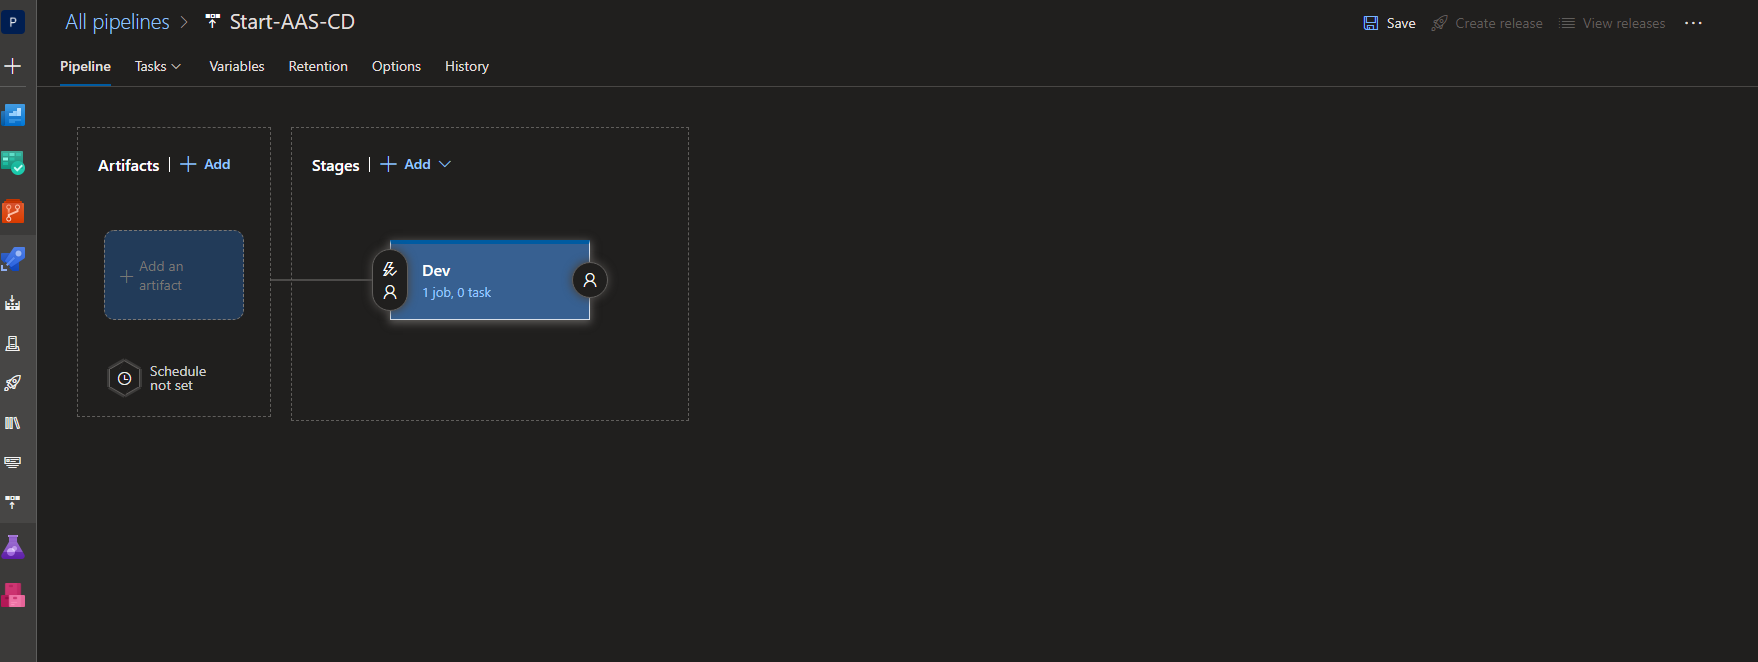
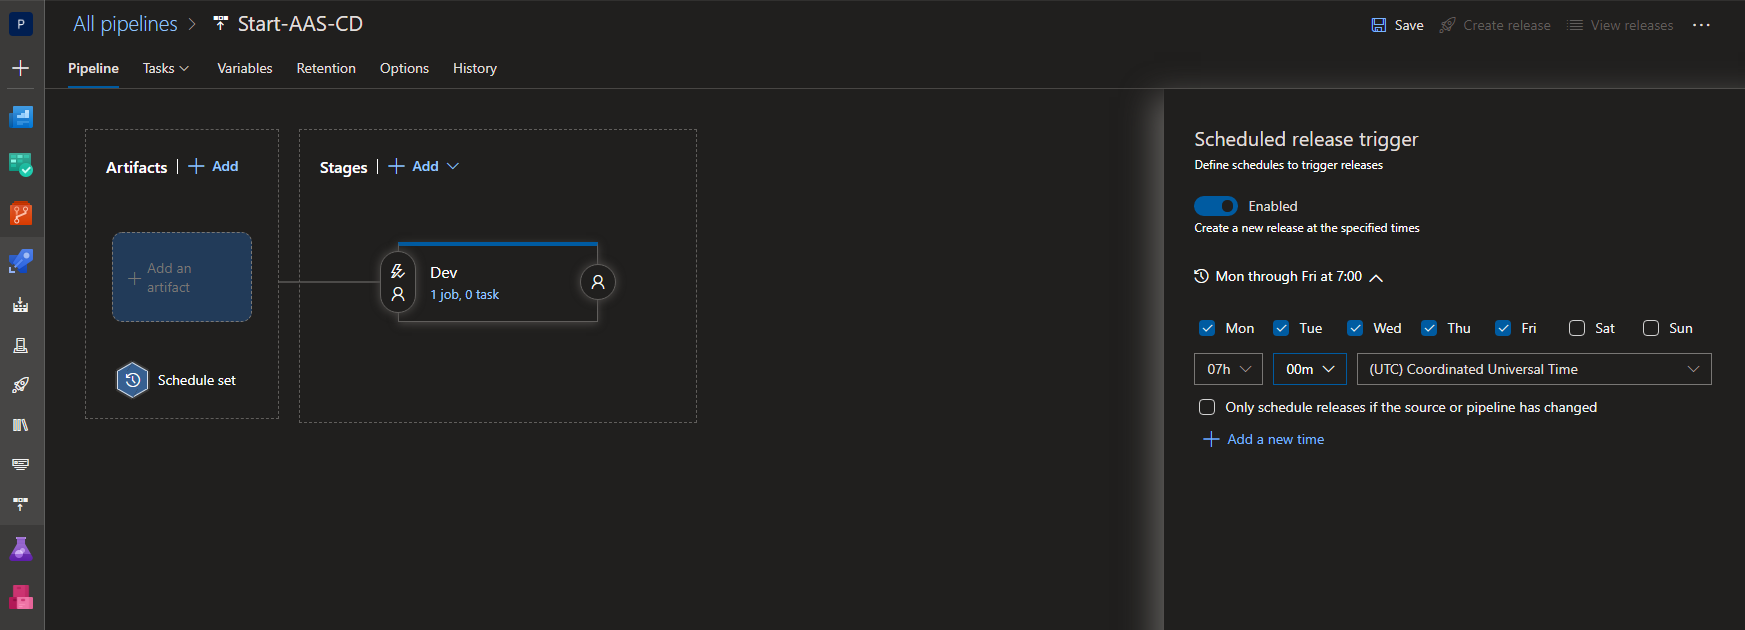
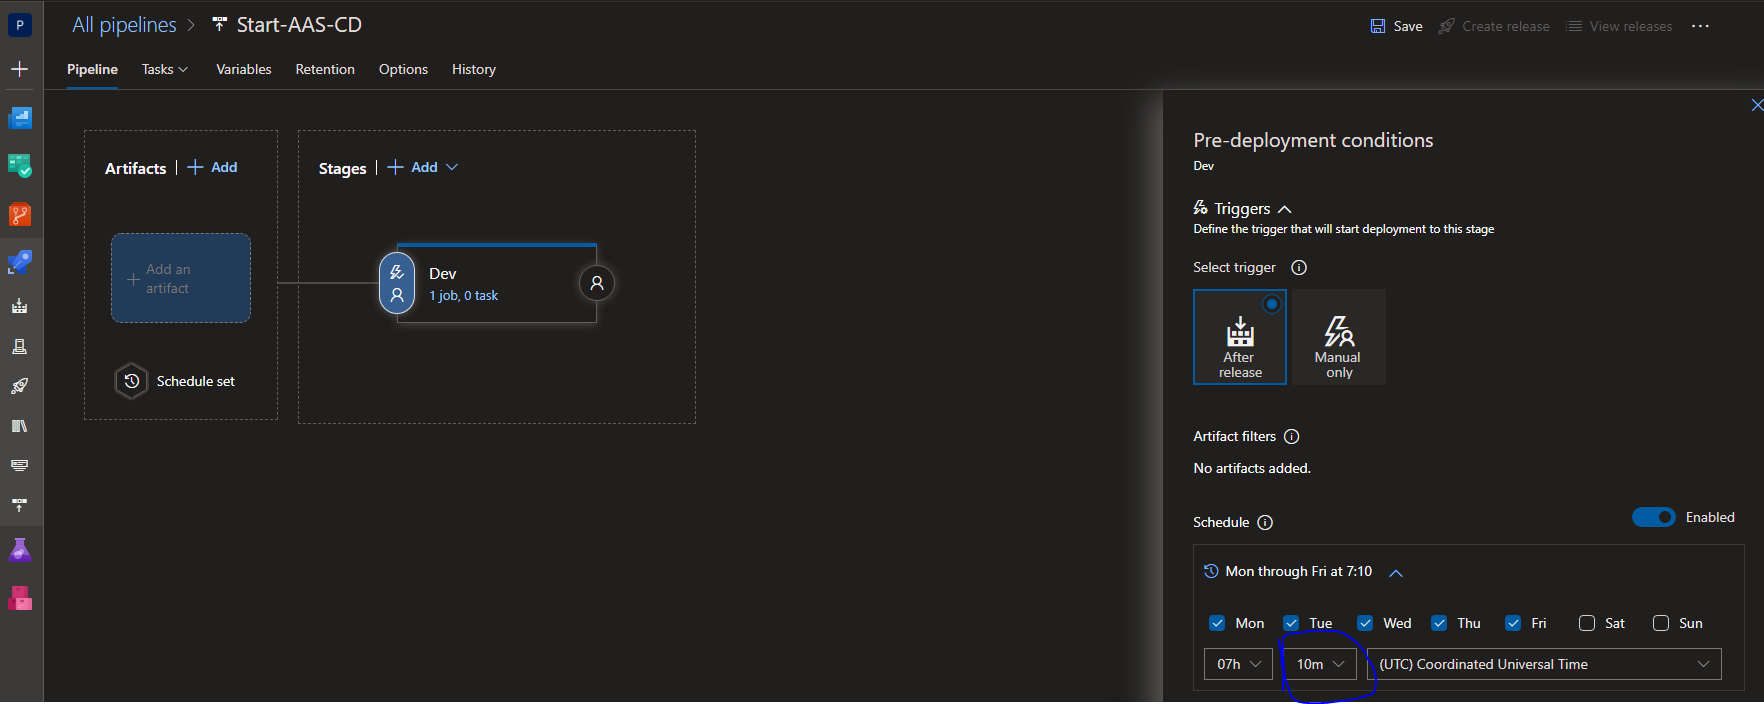
- Now we will have to schedule the release trigger to automatically create a release. Say that we have to turn on the AAS server at 7AM on weekdays and let it be turn off on weekends. This way we can save nearly 40-50% of overall cost.
- Click on
Schedule SetinArtifactsstage and enable the schedule
- Click on
triggertab inStagesand set the schedule to automatically trigger the task/s inDevstage. Note that we are selecting the trigger at 7:10AM as the release will be triggered at 7AM and there might me some delay to trigger the stage. To avoid this conflict let’s keep a buffer time of 10 minutes in trigger schedule.
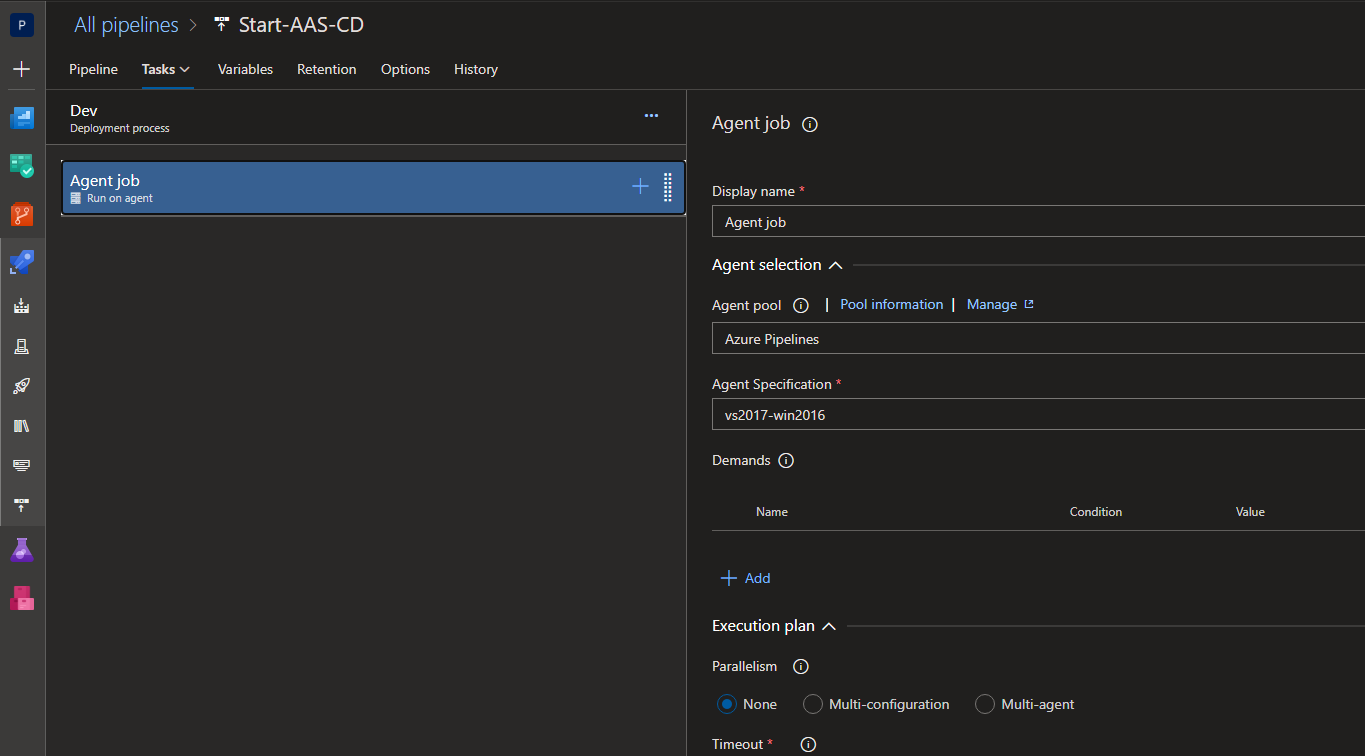
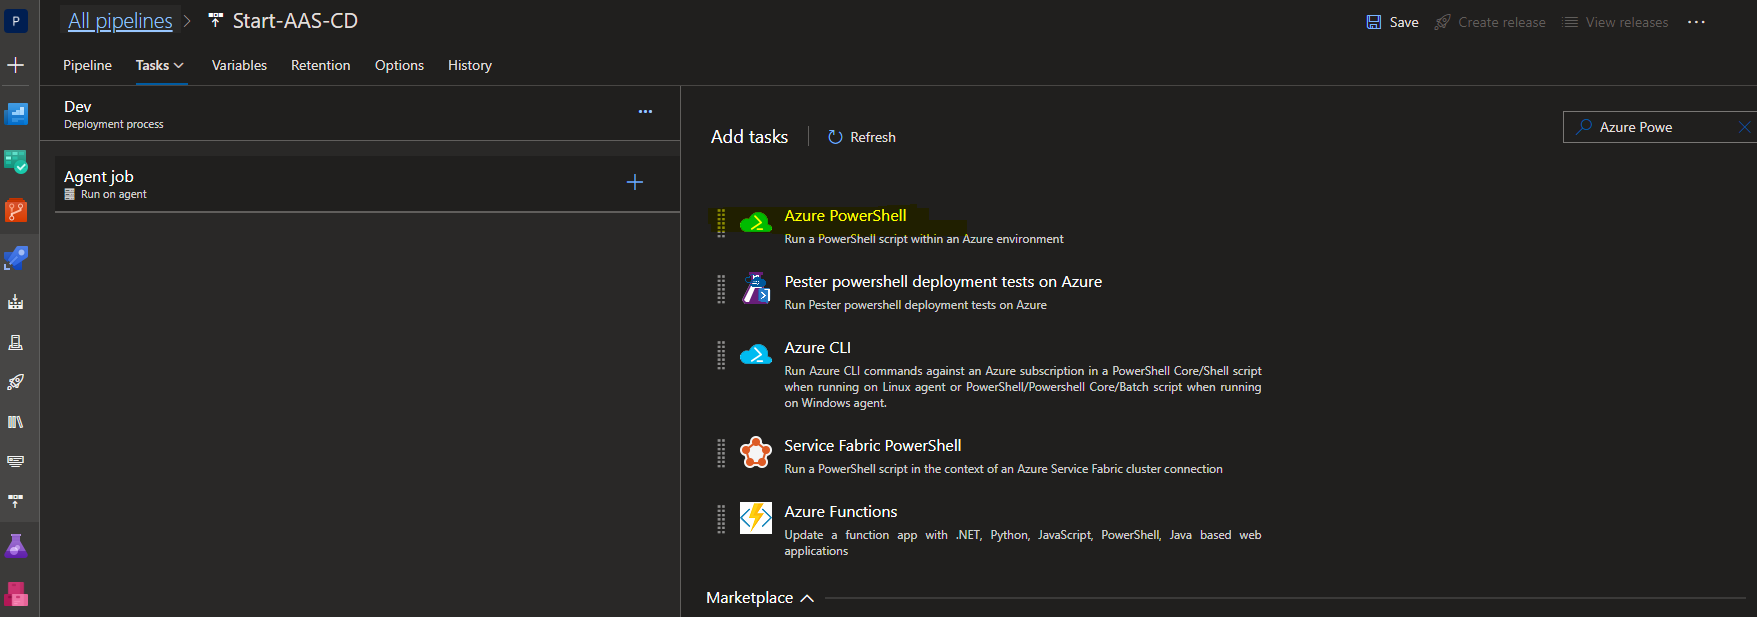
- Once the schedule is set click on tasks tab and click on
+inAgent Jobto add Azure PowerShell task from market place.
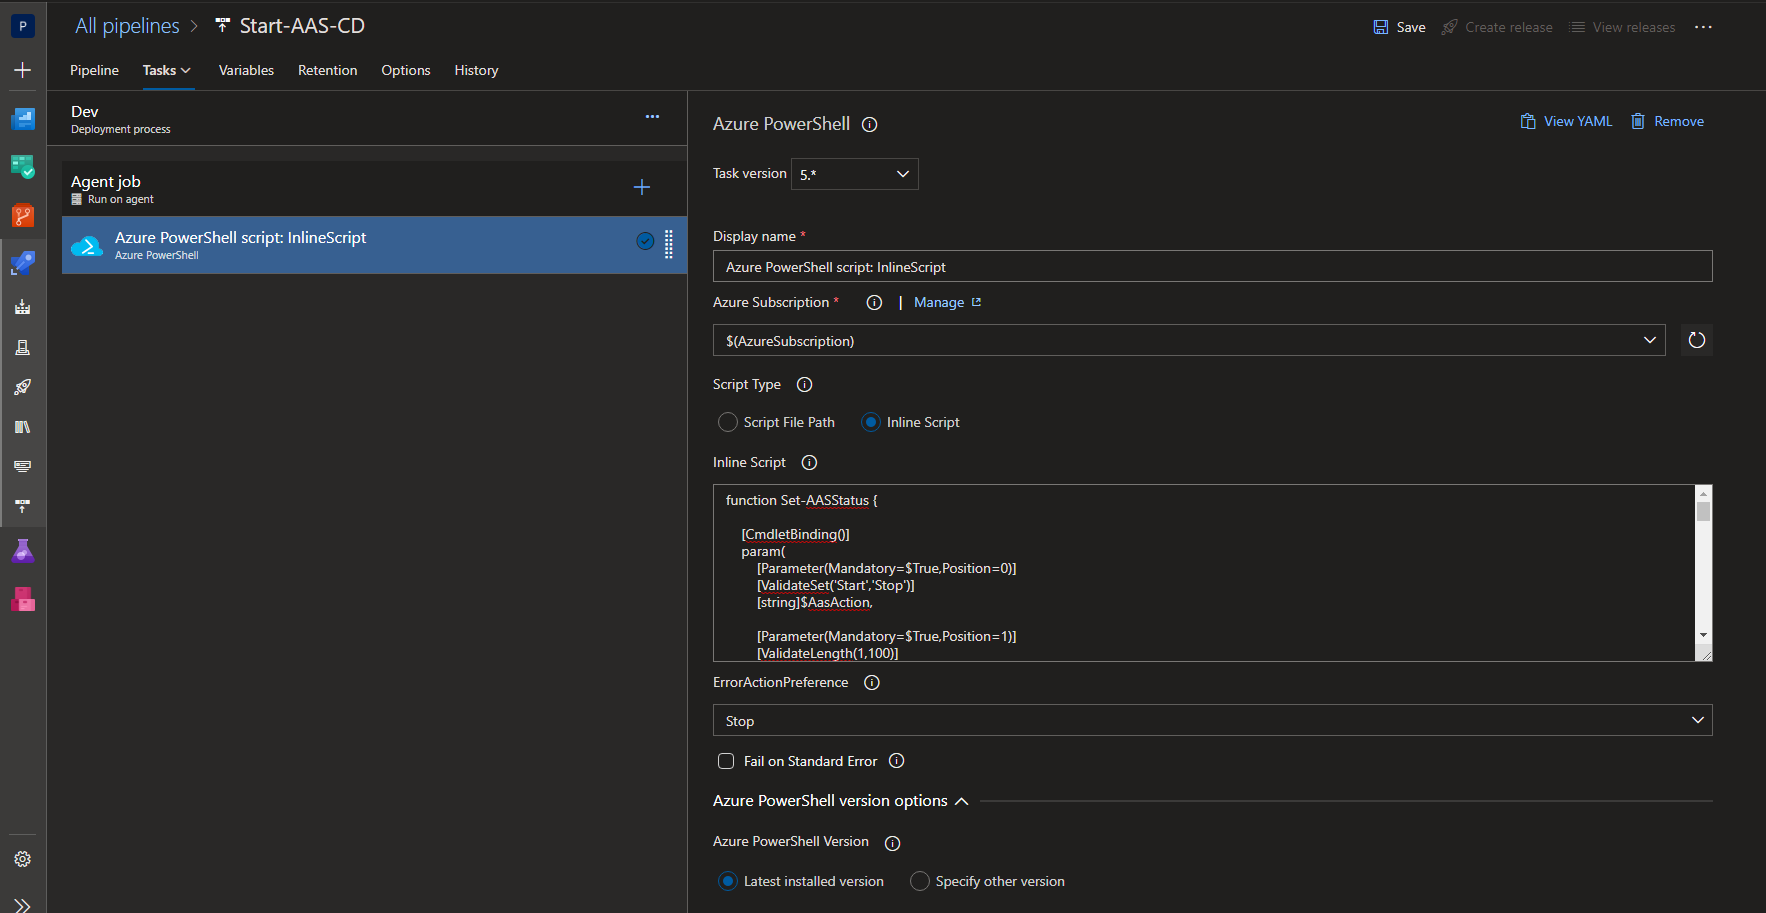
- Once the Azure PowerShell task is added copy and paste the
Set-AASStatusscript in the task. You can parameterize theAzure Subscriptionfield or select the subscription from drop down list. Here we’ve parameterized theAzure Subscription, hence it is specified as $(AzureSubscription)
-
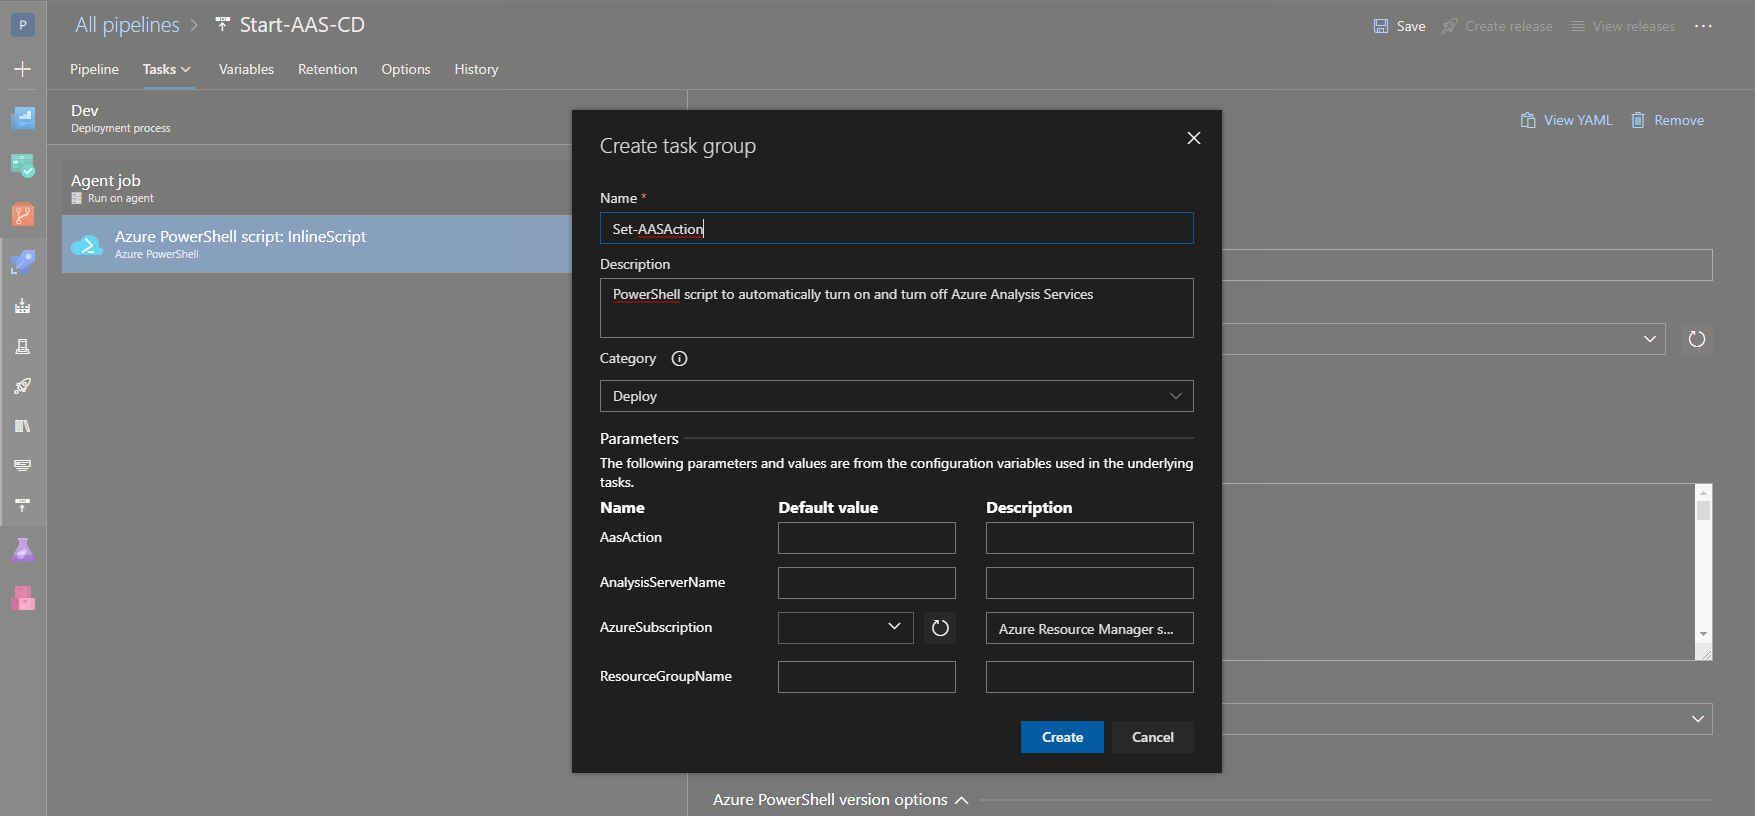
Right click on Azure PowerShell task and click on Create task group. Creating a task group helps us to re-use it by passing mandatory parameters dynamically for each environment. Pretend that you need to perform this task for five environments (dev/test/uat/pre-prod/prod), task group helps you to pass values to the parameters
$AasAction,$ResourceGroupNameand$AnalysisServerNamewithout the need of editing the script in each stage.You can find more about task groups here.
Click on create to create the task group.
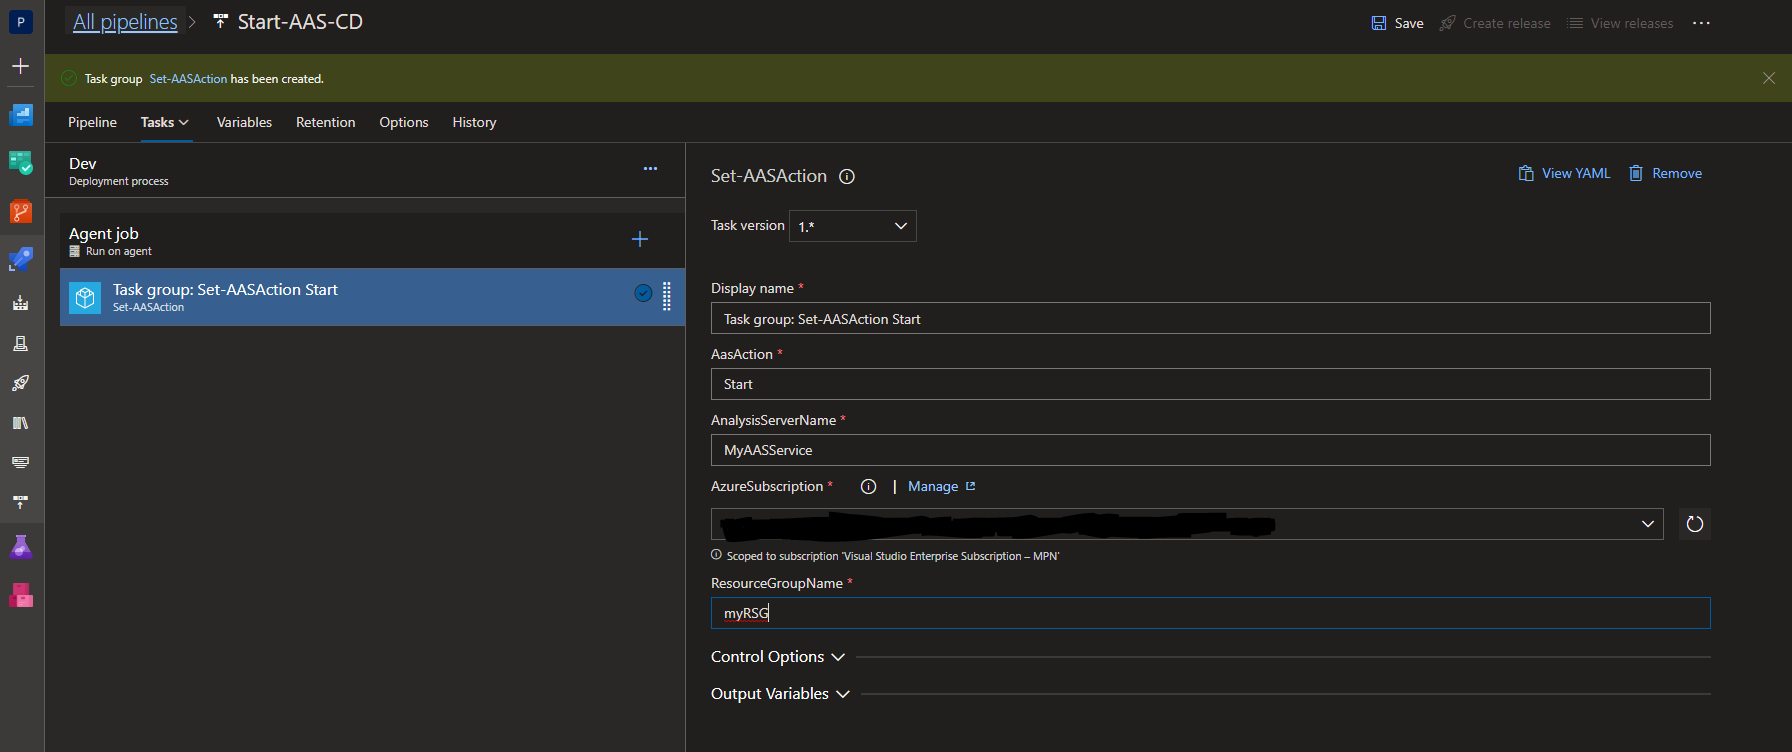
- That’s it, you’re set. Pass the values to the parameters and click on save. If you add more stages follow the same steps and instead of selecting Azure PowerShell you can add the task group
Set-AASActionand pass the values.
For more consistent pipeline settings, add the values in Variables tab by creating a Pipeline Variables and mapping it to each stage. You can view more about pipeline variables here.
- Follow same steps to create the release pipeline for stopping the AAS server by adding task group in tasks tab and passing the argument
StoptoAASActionparameter.
Conclusion
Setting up pipelines to start/stop AAS helps you to save costs and automate the process with few clicks.

